Instrument View
The Instrument View displays the measurement readings when an instrument is connected. The number of outputs and the parameter choices vary by instrument. Some of the options described may not be available for a particular instrument. The Power Supply application will only list settings and values that are available for the selected instrument type.
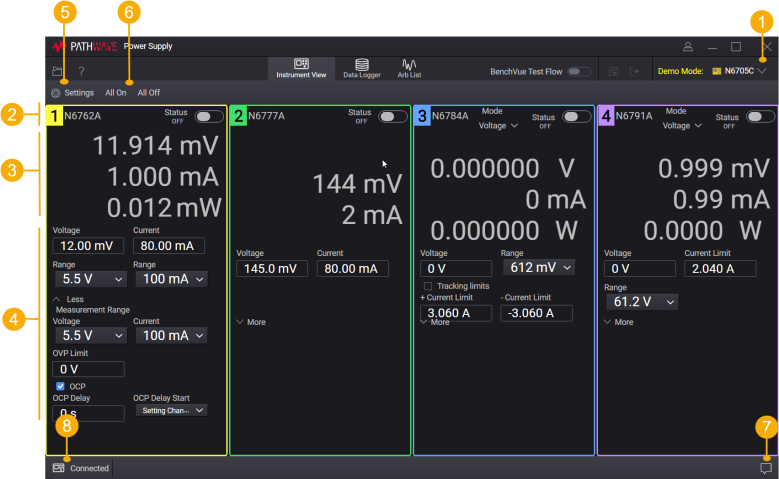
| 1 | The instrument that is connected. See Connect to Instrument. |
| 2 |
The title bar for each output shows the following:
Output number – Output number and the model number, if applicable. See Channel Output Display. Mode – Click to select the output priority mode, if applicable. Status – Shows the output status. Output on/off – Click the toggle button to enable or disable this power supply output. |
| 3 | Measurement readings for each output. |
| 4 | Basic settings that can be changed. If available, click More for additional settings. |
| 5 | Settings – Show or hide the Settings tab which lets you configure all available settings for the instrument. |
| 6 | All On, All Off – Enable or disable all outputs. |
| 7 | Displays notification messages generated by the Power Supply application. |
| 8 | Pause IO communication to the instrument. Once paused, the instrument can be operated from its front panel interface. A message indicates that the connection is paused. To resume the connection, click the Resume button in the message. |